

How To Create A Trusted Root Certificate
How to Create Trusted Self-Signed SSL Certificates and Local Domains for Testing
Set up local test domains and enable a trusted, self-signed certificate for quick, local testing
![]()
Most of the time, we'll have domains other than the localhost to test the applications locally, and we'll also need trusted self-signed SSL certificates.
Self-Signed Certificate
A self-signed certificate is a certificate that's signed by the person creating it rather than a trusted certificate authority. The development servers can be enabled with self-signed certificates that'll help us reduce the certificate cost and also the management overheads.
By default, the self-signed certificate throws a certificate-validation error when accessing the websites in browsers but will allow us to proceed to the actual pages by accepting the risk. In some cases, the self-signed certificates won't help us test some of the browser functionalities that only work through valid SSL — e.g., testing different browsers' APIs, like geolocation.
Let's now see how to quickly set up the local domains and a trusted self-signed certificate for testing in Windows. the same can be used in other systems with some additional steps.
Local Domains
Sometimes we may need to have different domains to test our application in the development environment. The DNS setup will consume more time and cost; the local domains help us to test the applications quickly in development environments.
I'm going to define the following test domains — myexample.com, sub.myexample.com, and myexample1.com.
Edit the Windows hosts file, C:\Windows\System32\drivers\etc\hosts. Add the below entries to map the test domains to 127.0.0.1 so the defined domains will be able to access the application running on the localhost within the same machine.
            127.0.0.1 myexample.com
127.0.0.1 sub.myexample.com
127.0.0.1 myexample1.com
Let's now create a self-signed certificate through OpenSSL.
Generate a Root SSL Certificate
Create an RSA-2048 key, and save it to the file rootCA.key.
openssl genrsa -des3 -out rootCA.key 2048 When you get "Enter passphrase for rootCA.key," enter a passphrase and store it securely.
Create a root certificate through the key generated.
openssl req -x509 -new -nodes -key rootCA.key -sha256 -days 1460 -out rootCA.pem Change the validity days as needed.
When you get "Enter passphrase for rootCA.key," enter the passphrase used while generating the root key.
Enter the other optional information:
- Country Name (2 letter code) [AU]: US
- State or Province Name (full name) [Some-State]: MN
- Locality Name (e.g., city) []: Eagan
- Organization Name (e.g., company) [Internet Widgits Pty Ltd]: Tech Forum
- Organizational Unit Name (e.g., section) []: Marketing
- Common Name (e.g., server FQDN or YOUR name) []: Local certificate
- Email Address []:
admin@techforum.com
Trust the Root SSL Certificate:
Now the root certificate is ready. Let's trust the root SSL certificate in the local system.
Run the below command through the command prompt (run through elevated access):
certutil -addstore -f "ROOT" rootCA.pem Now the root certificate is added as part of the Trusted Root Certification Authorities.
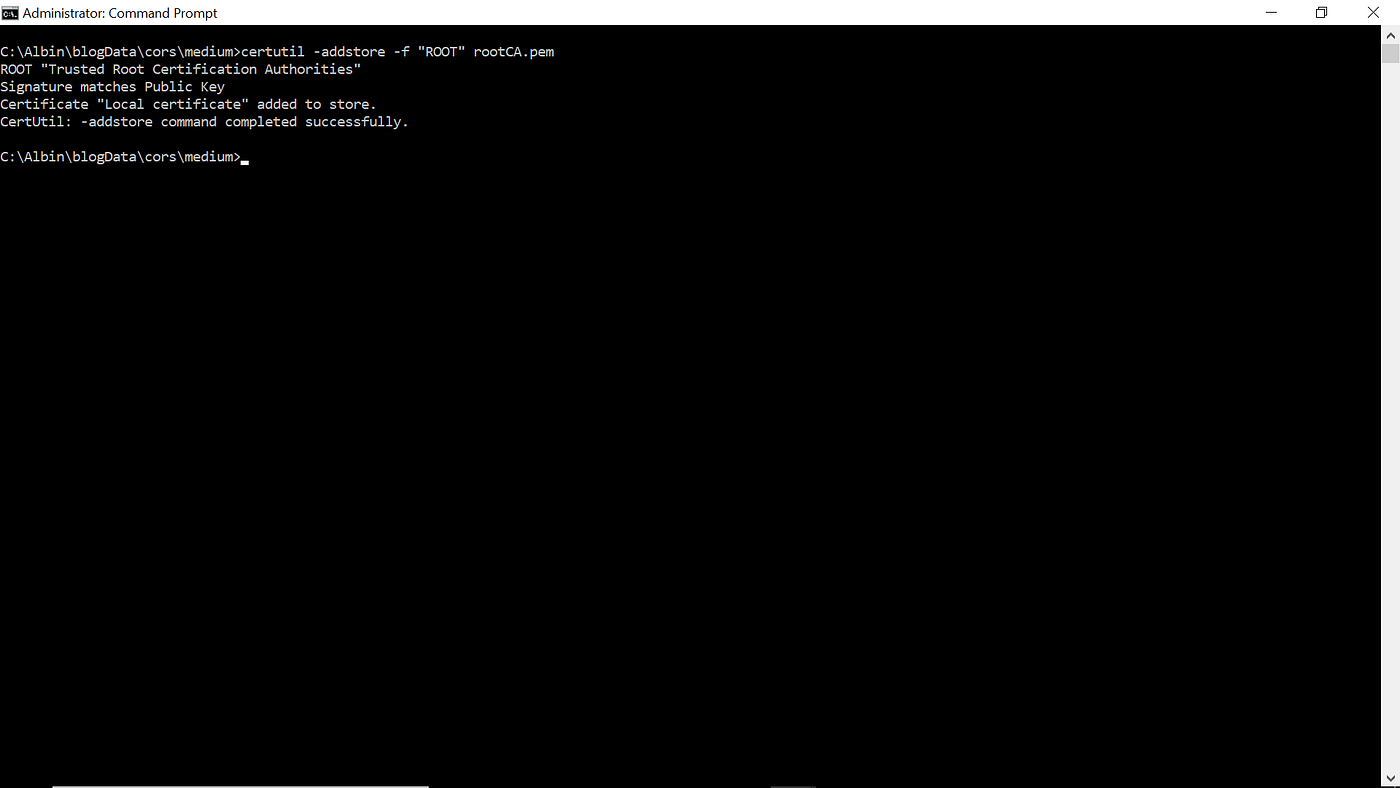
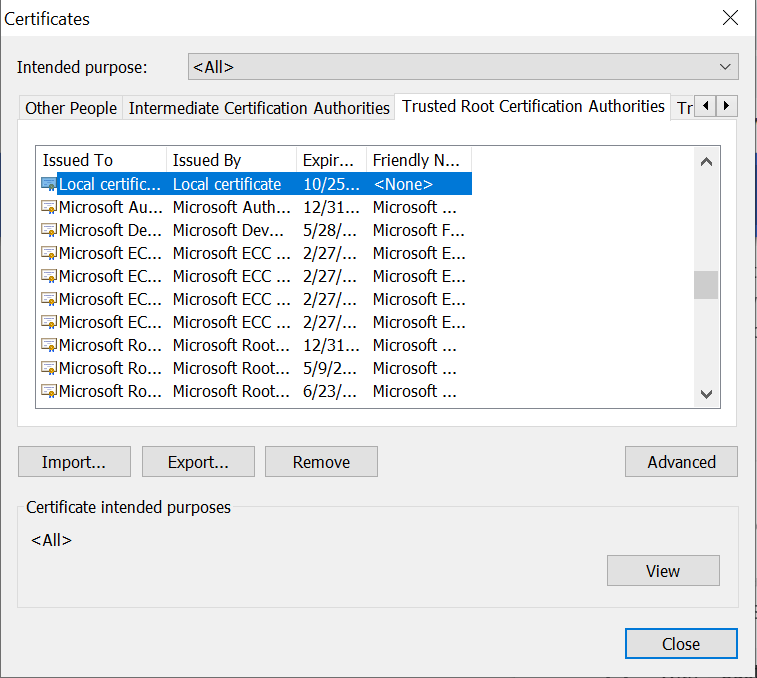
You can verify the certificate through Certificate Manager or Certmgr.msc.

Even the root certificate can be managed through browsers: In Chrome, navigate to Settings → Privacy and Security → Security → Manage Certificates → Trusted Root Certification Authorities.
You can import/export and remove the certificate (the certificates can't be removed if it was imported through Certmgr.msc):
If you use Firefox for local testing, it won't consider the root certificates from the Windows cert store(Chrome and Edge refer to the root certificates from the Windows cert store). The self-signed root certificate should be imported to Firefox separately.
Navigate to Options→ Privacy and Security → Security → Certificates → View Certificates.
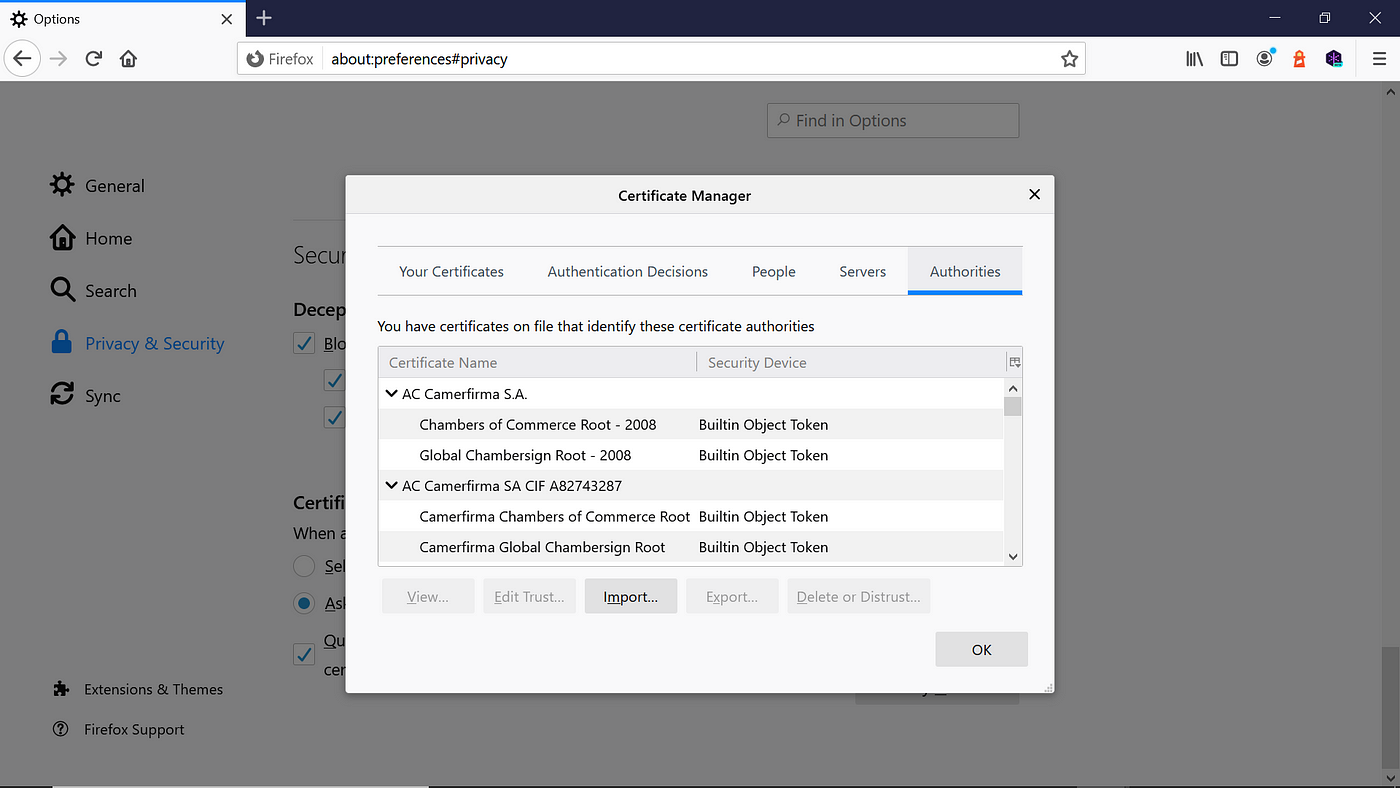
You can import/export and remove the certificates. Import the Root CA certificate generated in the earlier steps. Select "Trust this CA to identify websites."
Generate an SSL SAN Certificate With the Root Certificate
The root certificate is trusted now. Let's issue an SSL certificate to support our local domains — myexample.com, sub.myexample.com, myexample1.com, and localhost for testing.
Create a new OpenSSL configuration file server.csr.cnf so the configurations details can be used while generating the certificate.
            [req]
default_bits = 2048
prompt = no
default_md = sha256
distinguished_name = dn[dn]
C=US
ST=MN
L=Eagan
O=Tech Forum
OU=Marketing
emailAddress=admin@techforum.com
CN = localhost
Create a v3.ext file with a list of local SAN domains:
            authorityKeyIdentifier=keyid,issuer
basicConstraints=CA:FALSE
keyUsage = digitalSignature, nonRepudiation, keyEncipherment, dataEncipherment
subjectAltName = @alt_names            [alt_names]
DNS.1 = myexample.com
DNS.2=sub.myexample.com
DNS.3=myexample1.com
DNS.4=localhost
Create a private key and certificate-signing request (CSR) for the localhost certificate.
openssl req -new -sha256 -nodes -out server.csr -newkey rsa:2048 -keyout server.key -config server.csr.cnf This private key is stored on server.key.
Let's issue a certificate via the root SSL certificate and the CSR created earlier.
openssl x509 -req -in server.csr -CA rootCA.pem -CAkey rootCA.key -CAcreateserial -out server.crt -days 500 -sha256 -extfile v3.ext When it says "Enter passphrase for rootCA.key," enter the passphrase used while generating the root key.
The output certificate is stored in a file called server.crt.
Enable the SSL Certificate for the Local Server
Let's now enable the certificate for the local server. I'm going to configure the certificate with the Express.js application to enable the trusted SSL communication.
app.js
            var express = require('express')
const path = require('path')
const https = require('https');
const fs = require('fs');            var app = express ()            app.get('/index.html', function (req, res) {            res.sendFile('index.html', {
              root: path.join(__dirname, '.')
              })
})                          https.createServer({
                key: fs.readFileSync('ssl\\server.key'),
                cert: fs.readFileSync('ssl\\server.crt')
}, app)
.listen(443, function () {
                console.log('Example app listening on port 443! Go to                            https://localhost/              ')
})
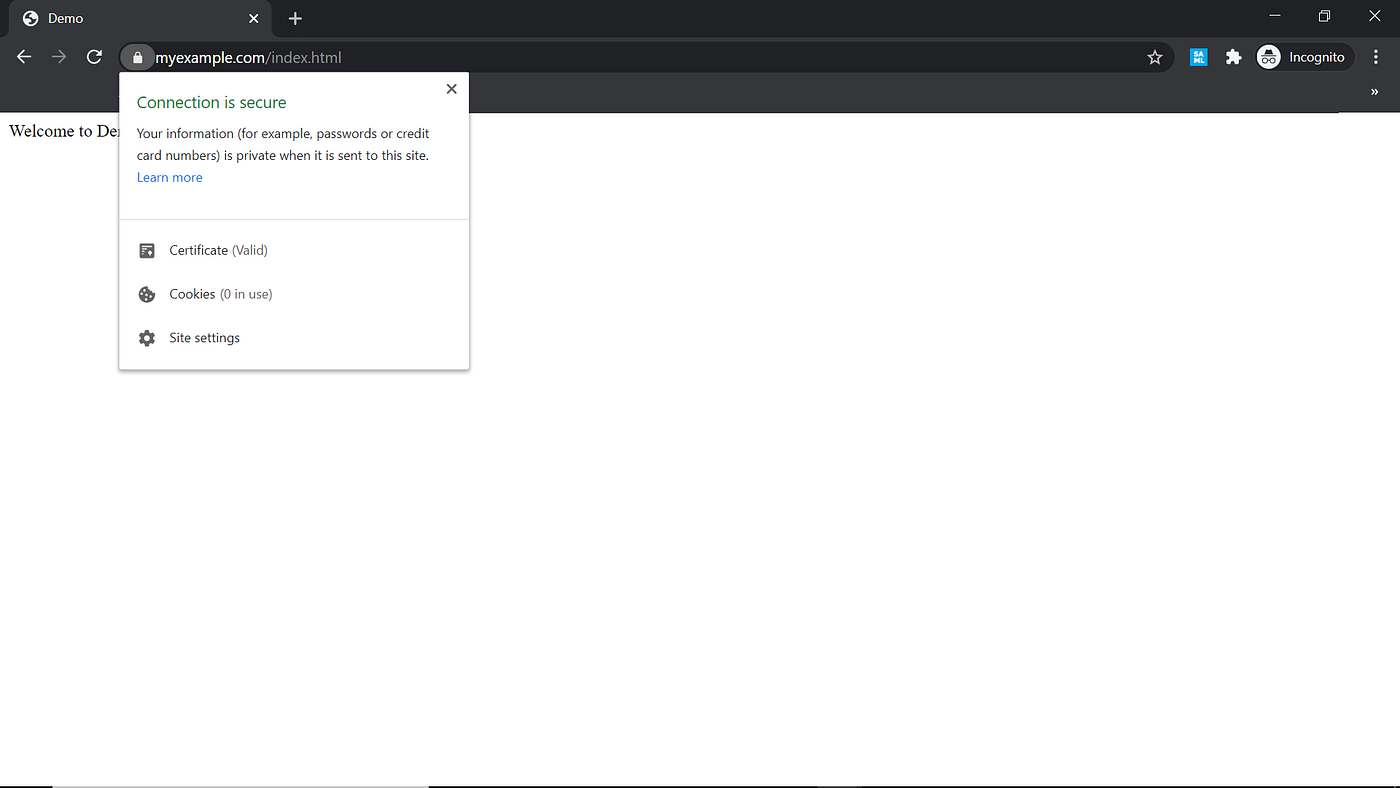
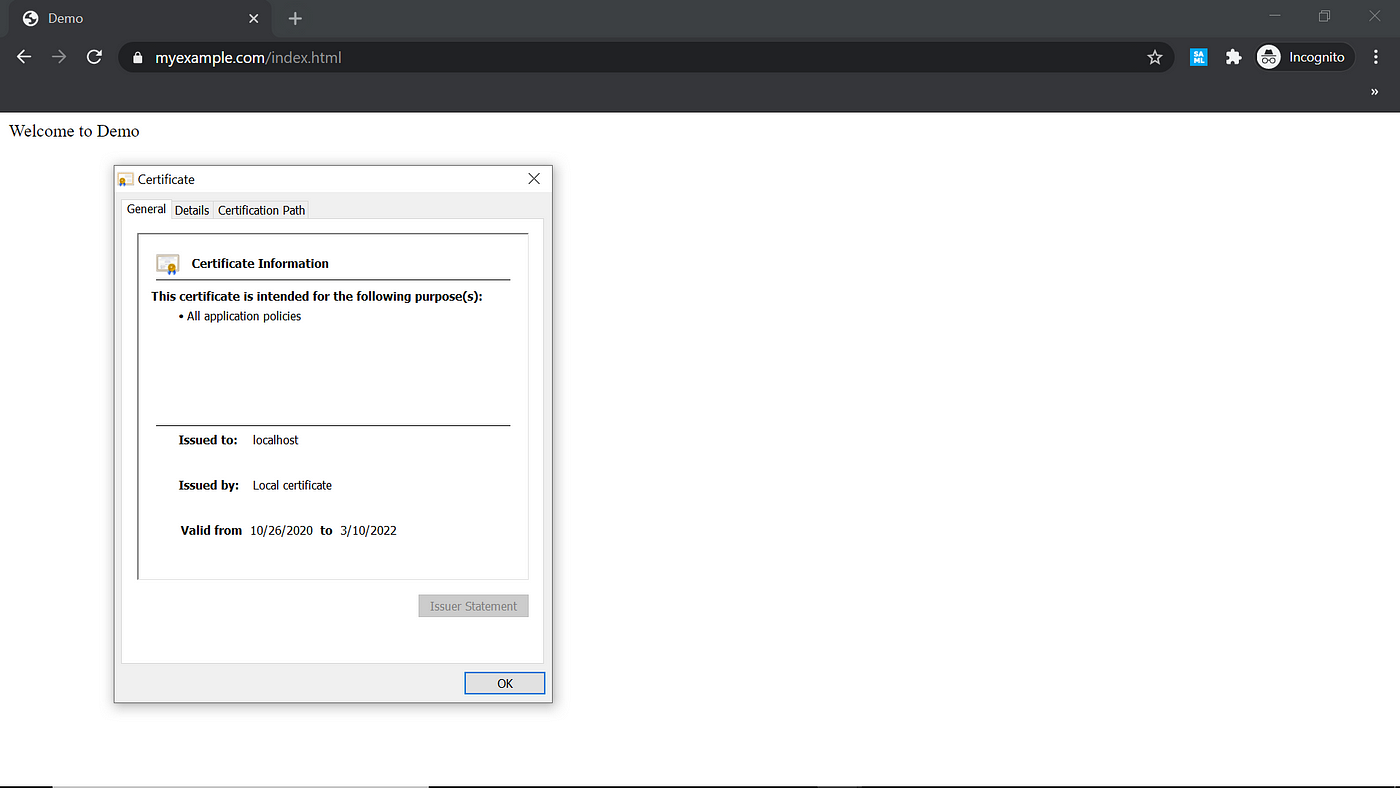
Now the certificate is trusted from the browser for the test domains myexample.com, sub.myexample.com, myexample1.com, and localhost.
The trusted, self-signed certificate along with local domains can be used for development and initial testing. This will help us to quickly enable trusted local domains to test some of the scenarios that require the trusted SSL certificate.
How To Create A Trusted Root Certificate
Source: https://betterprogramming.pub/trusted-self-signed-certificate-and-local-domains-for-testing-7c6e6e3f9548
Posted by: bensonhaveracter.blogspot.com
0 Response to "How To Create A Trusted Root Certificate"
Post a Comment